
According to the 2020 “Cost vs Value” in Remodeling Magazine, the average American homeowner spent $24,700 if they decided to install an asphalt shingle roof using mid-range quality material.
That’s not a number to sneeze at.
And unfortunately, the typical return on your investment with roof repairs is 66%, or in the typical case, about $16,000.
And yet, when it needs to be replaced, it needs to be replaced. It’s one of those situations where you’re just going to have to bite the bullet and open your wallet. There’s nothing that can be done about that.
Or is there?
As with most home improvement or lawn care endeavors, preventative maintenance is the best line of defense that you have.
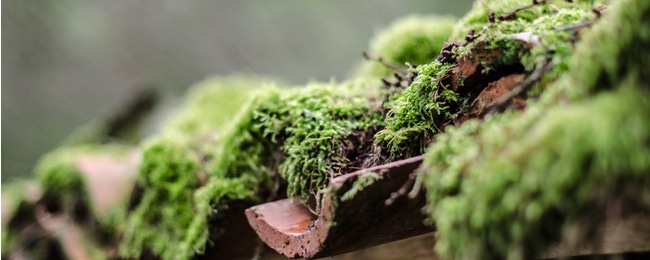
One of those preventative maintenance measures is dealing with any moss growing on your rooftops. When this invasive plant grows on your shingles it can cause several significant issues.
Today you’ll learn a few different methods you can use to remove moss from a roof. You’ll also learn some additional steps to prevent it from coming back.
So before you spend money installing shingles that you won’t recoup, you need to arm yourself with the information you’ll find in this article.

Problems Caused by Moss
These little non-vascular plants can do some real damage. Let’s take a look at the number of problems that they can cause.
They Weaken the Surface
Moss are living organisms. As such, they require food, water, and air to survive. Finding air and water is a given, but what about the food?
Well, they will eat away at the shingles. Manufacturers use preservatives in shingles that they love to feed on. By doing so, it weakens the integrity of the roof surface.
This is the beginning of the degradation process. It’s also the gateway to costing you a lot of money.
The rhizoids that anchor the plant will begin to systematically pull the shingles up off of the roof. Since your first line of defense against water, wind, and other debris is weakened, you will run into a whole host of other problems.
It Weakens the Structural Integrity
With the shingles raised up, the wind can tear them off completely — they act like a sail on a boat and tear off rather easily. Also, when they’re raised up, your roof also become vulnerable to water damage.
Because water will take the shape of anything it comes into contact with, it comes ready-made to find the flaws on the surface of your roof. For instance, it will find the holes caused by nail. Once this vulnerability is exposed, water will be able to leak through into the interior of your home.
Another problem that arises when the shingles are raised is that water has immediate access to soak into the roof’s structure. As the wood becomes soaked with water, it rots. Wood rot will weaken the deck, rafters, and ceiling joists.
Over time the water that has soaked into the wood will get heavier. This weight can potentially cause all of it to collapse.

It Can Raise Your Bills
Shingles help absorb the heat from the sun and keep heat from escaping from your home. If the damage caused by the moss weakens these, you will have a hotter or colder attic.
Inevitably, you’re going to raise or lower the thermostat accordingly and of course, this will raise your bills.
It Can Cause Water Damage
Even without raised shingles, it can cause water damage to your roof.
If you have ever touched live moss then you have certainly felt how wet it is. It retains moisture to survive, but by doing so, it keeps your roof in a constant state of being wet.
It also affects the drainage. Roofs are designed to run water towards the ground. Clumps of mossy growth will disrupt the natural drainage pattern. This can result in water pooling on the surface and soaking into your house.
Algae Growth
The conditions necessary for its growth also provide the perfect growing conditions for other dangerous molds and algae.
Since moss thrive in damp environments and retain water, mold and algae can get their moisture from the moss. Unappealing stains and streaks are almost always caused by algae growth.

It Can Freeze
Moss will keep your roof wet, even in the winter. When temperatures drop low enough to freeze, the water in the plant will freeze as well.
As you know, water expands as it freezes. If the moss has raised the shingles, you may experience serious damage when it freezes.
Don’t Find Out When It Is Too Late
You cannot allow it to grow and thrive unchecked. The damage that it causes to the overall structural integrity of your home can be irreversiblee.
Tools You Will Need
Here is a list of the things that you will need. All of these tools can be found online or in your local gardening store.
Rubber Gloves
Safety first. You’ll be handling some toxic chemicals. Protective outerwear is a must. Only use rubber gloves as the caustic liquids you will be handling will not absorb into them.
Garbage Bag
This will serve as the disposal bag once you have detached them from the roof.
Garden Hose
You will need a garden hose to spray off the roof once it has been treated. Make sure to have a proper spray nozzle attached to your hose to help make the process easier for you.
Ladder
Use a ladder appropriate for both the height of your home and your experience level. If you aren’t comfortable working at a certain height, don’t risk it. Call a general contractor and have him or her recommend someone for the job.
Safety Rope
This is only needed if you are going to have to walk onto the roof. If so, anchor it safely to prevent you from falling off.
Moss Killer

Use a killer that is specifically designed to stop it from growing. Also, if you can find it, use one that is rated by the Environmental Protection Agency. “Moss Out” is a good example.
Bleach Mixture

If you cannot find a suitable moss remover, use a mixture of oxygen bleach with water as a treatment. I tend to prefer oxygen bleach over chlorine bleach since chlorine bleach is much stronger and may cause damage. Mix 2 cups of oxygen bleach with 2 gallons of water.
Be careful with this ratio, as bleach products (particularly chlorine bleach) can do damage if it is too concentrated.
What You Shouldn’t Use For the Removal Process
Removing moss on a roof is not the same as removing it from your driveway. There are physical dangers you face from falling while working. And certain methods will damage the shingles and the roof itself.
Scrub Brush
I understand the temptation to use a scrub brush to remove mossy growth. However, avoid the temptation. The brush will only cause more damage as you scrub.
Pressure Washer
Pressure washing your roof can also be more harm than beneficial. The water pressure is also strong enough to break the shingles’ adhesive and lift it from the surface.
Harsh Chemicals
Just like high concentrations of bleach, using harsh chemicals can do further damage. This damage can eventually wind up causing leaks down the road from the damage they do.
Step by Step Guide
Follow these steps for the removal process.
Step 1: Prepare Your Tools
Gather the equipment you need for the job.
If you are not using a moss-specific chemical, like “Moss Out”, then you can put 2 gallons of water into a pump sprayer and mix 2 cups of bleach into it.
Step 2: Set Up Your Ladder
Set up your ladder safely near the area you will be treating. With your spray in hand, climb the ladder.
Step 3: Spray
Spray the mossy area with your mixture.
For store-bought chemicals, allow the treatment to sit on the plants for the time suggested on the bottle. For homemade mixtures, allow the solution to rest for 25 minutes.
Step 4: Spray It Again (With Water This Time)
Using the lowest pressure setting on your water hose, spray the area down with water.
You should find that most of it comes off with the spray of the water. Take care to not direct the spray in between the shingles.
Even if all the moss does not fall away, it is important to rinse the area thoroughly to remove any chemical residue. If you do not spray it off, over time this residue could cause damage to your roof.
Step 5: Pick Up the Remnants
The remnants should be loose enough to pick up by hand.
Make certain your ladder is resting safely and firmly on the ground. Lean over and gather the remaining moss and place it into your garbage bag. For safety, attach your garbage bag to the ladder so that you have both hands free.
If it is in an area that is unreachable by ladder, consider calling a professional. We all have different experience levels when it comes to this sort of thing. Operate within the bounds of your experience. A mistake so high up can be fatal.
Preventative Care
There are two ways of preventing it from making an appearance.
Open Up The Area
Trim back anything that may be casting a shade onto your roof. The more sunlight that you can get, the less chance there is that it will come back.
Metal Strips
Install copper or zinc strips of metal on the ridge to prevent it from growing back.
The strip will oxidize over time and wash down the roof plane when it rains. This will make the environment much less hospitable for moss, algae, and lichen.