

Fresh produce from the garden tastes much better than store-bought, and homegrown potatoes are no exception. Planting potatoes takes a little more work than other veggies, but you’ll be rewarded with a bountiful harvest at the end of the season.
With the following tips and techniques, you’ll be well on your way to enjoying fresh spuds come fall!

Choosing What Type to Plant
Russet…red-skinned…Yukon…fingerling…with many different types of potatoes on the market, you have plenty of options for growing. The best type to plant in your garden depends upon how you plan to use them after harvesting.

What are the Differences Between Varieties?
Different varieties contain varying amounts of starch and sugar in their flesh, and they cook differently.
- Potatoes high in starch break down as they cook. They are best for baking, mashing, or making wedges or fries. Russets are the most common and come in many different varieties.
- Potatoes low in starch are waxier and hold together well when cooked. These types are great for soups, stews, or potato salads. The most common are Yukon Gold, red-skinned, and fingerlings.
Can You Use Store Bought to Grow?
Potatoes purchased from the market (unless organic) are treated with a sprout inhibitor for storage. Avoid using them. Instead, purchase seed potatoes from a local nursery, garden center, or your favorite online retailer.

Different Ways to Grow
Potatoes can be planted in many ways, depending upon where you live (apartment, house, etc.) and the amount of space you have. Each method has pros and cons and yields different results.
- Hilled rows are the cheapest way to plant, and yield good results. Shallow trenches for planting are dug directly in the ground requiring nothing to build or buy.
- Raised beds yield the best results. They work well if you have poor soil or physical limitations, making it hard to bend over. The downside is they need to be built and filled with soil – this is a lot of work, and the cost increases.
- Wood boxes are a smaller version of raised beds and yield similar results. Building them is also expensive and time-consuming since you need a single box for each plant.
- Wire cylinders provide excellent draining in rainy climates, keeping the potatoes from rotting. The downside is that the air movement through the mesh can dry the soil out too quickly.
- Containers are a good option for homeowners with limited space or no yard. They can be used on patios or balconies, opening up gardening options. The soil in containers dries out more quickly, though, and the soil temperatures are higher, resulting in smaller tubers.
- Grow bags are another version of container gardening. Bags are constructed of heavy, dense polypropylene. The potatoes are easy to harvest, and the bags are convenient to store over winter. This method is one of the most expensive, though.

Growing Season
Potatoes do well in cooler weather and can be one of the first vegetables you plant in your garden come spring.
Many recommendations suggest waiting until around the time of the last expected frost for your area before planting. The soil temperature should be at least 50℉ and has dried out enough that it doesn’t clump together when you work it.
If you choose to plant before the last frost-free date, cover plants if there is any frost danger. Frost damages the tender young foliage and can kill the plant.
Site Selection
Regardless of where and how you choose to grow your potatoes, make sure they have the following:
- A “full sun” spot to live. They need a home that gets at least 6 hours of direct sunlight daily.
- Well-draining, loose soil that is high in organic matter. Hard or rocky soil makes it harder for the tubers to grow and develop.
If you are planting in-ground, choose a spot that follows acceptable rotational practices to avoid the carryover of diseases harbored in the soil. Avoid planting in a section where tomatoes, peppers, or eggplants were grown in the last three or four years.
Soil Preparation
If planting in-ground, work the soil to a depth of 12”, breaking up dirt clods to make the soil “loose” before planting. Work in fully rotted manure or finished compost to improve soil texture and drainage.
Previously used potting soil should be checked for insect pests and mixed with new organic matter.

Planting Steps
Once the soil is prepped and ready, it’s time to get the seed potatoes in the ground!
- Start by separating the eyes on the seed potatoes. Cut any larger than 1.5” in diameter (about the size of a golf ball) into quarters using a clean, sterilized knife, making sure there is at least one eye on each piece.
- Set the pieces in the direct sunlight or in a moderately lit room for a couple of days where the temperature is at least 70℉. The exposed flesh will begin to form a callous, helping to prevent rotting after planting.
- Use a shovel or garden trowel and dig trenches in the soil 6 to 8 inches deep and 3 feet apart.
- Place seed potatoes cut side down, about 12 to 14” apart at the bottom of the trench.
- Cover gently with 3 to 4” of soil.
- Water well, thoroughly soaking the soil.
Caring for Your Plants
Now that your potatoes are in the ground, you’ll reap the biggest harvest if you care for the plants well.
Hilling
As they grow, the plant sends up a main shoot that develops leaves and flowers. Along this main stem, it sends out secondary stems, or stolons, where the tubers develop. To protect the tubers from sunlight, it’s necessary to “hill up” the soil around the stem as the plant grows.
When sprouts reach 6-8” tall, use a hoe or shovel to gently cover the plants with 3 to 4” of soil, making sure not to cover the sprouts’ top. As they grow, continue covering them with soil until the mounds or hills are about 10-12” above the ground.

Watering
Water is critical when growing potatoes. Moisture stress prevents new tubers from forming and causes existing tubers to become knobby or develop hollow spots, so it’s essential to keep plants well-watered without the soil being waterlogged. But too much water leads to rot or disease.
To hit that sweet spot between too little and too much water, aim to give your plants 1” of water per week. This can come through rainfall or supplemental irrigation. If watering plants yourself, give them a thorough soaking once or twice a week instead of light watering every day. If your soil is high in sand and the water moves through quickly, opt to water twice a week.

Fertilizing
Potatoes are heavy feeders, needing more fertilizer to grow than other vegetable plants. Fertilizers containing a higher level of phosphorus and potassium and lower nitrogen will encourage tuber development instead of massive foliage growth. Example: 5-10-10
Two to four weeks after planting, apply a granular fertilizer – according to the suggested manufacturer’s rate – alongside the row(s) of potatoes, keeping the fertilizer from touching the plants’ foliage. Water it in well and repeat every four weeks during the growing season. Stop fertilizing a couple of weeks before harvest.
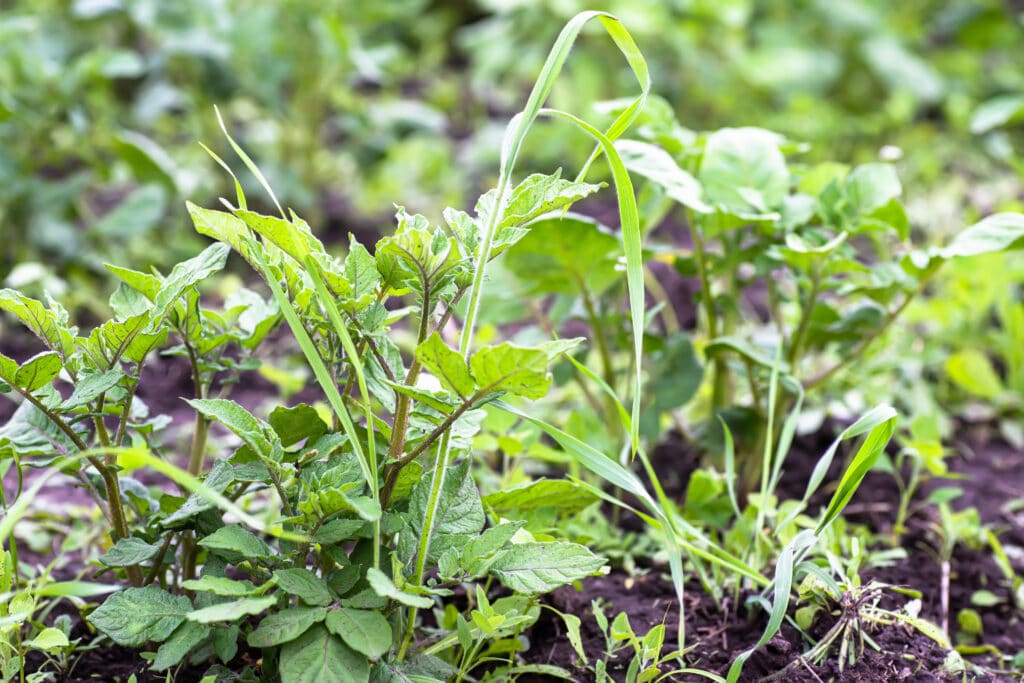
Weed Control
Nobody likes to see weeds growing in their garden, and they can be harmful to your plants too. Weeds compete with plants for sunlight, water, and nutrients, leading to reduced yields.
You can add a couple of inches of mulch between the rows to help prevent weeds. If weeds do pop up, pull them by hand or hoe between the rows. Be cautious about chemical control methods as unintentional drift can damage potato plants.
Insect Pests
Insects can be little buggers (pun intended) once they start munching on your plants and quickly wreak havoc if left to their own devices. Visually check plants often for signs of infestation and treat them immediately.
Common insect pests include:
- Colorado potato beetle
- Aphids
- Wireworm
- Cutworms
Diseases
Unfortunately, potatoes are very prone to fungal diseases, so they must be carefully monitored for symptoms and treated quickly when found. If left untreated, they can spread rapidly and decimate all of your plants.
The most common fungal diseases include:
- Early blight
- Late blight
- Fusarium wilt
- Verticillium wilt
- Mosiac virus
- Common scab

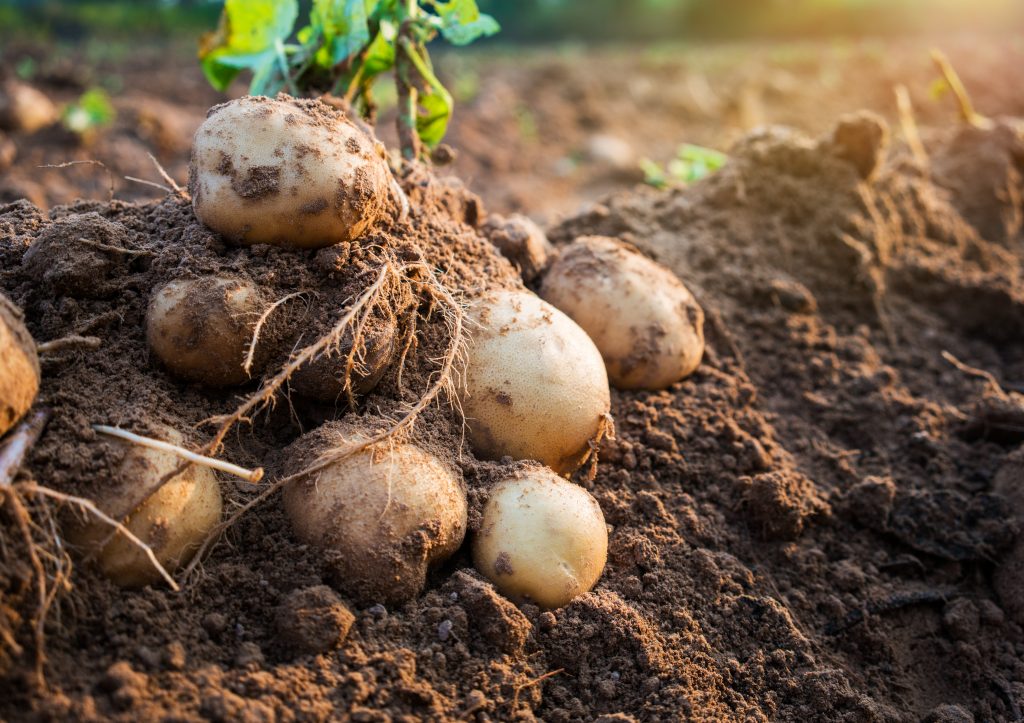
Harvesting and Storage
Come fall, when the weather starts to cool down, your plants will turn yellow and begin to die. This signifies harvest is approaching. Wait for 2 to 3 weeks after die-back to harvest.
- Use a spading fork or your hands to loosen potatoes from the soil. This prevents piercing the spuds when digging.
- Lay spuds in the sun for a couple of hours to dry.
- Brush all of the loose dirt off. Do not rinse the potatoes with water until it’s time to use them.
- Store them in a cool, dark location such as a basement or cellar.
- Enjoy!